
Recently we showcased the work of Northern Star Resources and their VR induction project. In this article, we expand on how this use case can be achieved using Facilitate.
The induction use case employs 360-based imagery, either video or photo, or a combination of both.
To create such an experience, the first step is to capture the required images or videos on site.
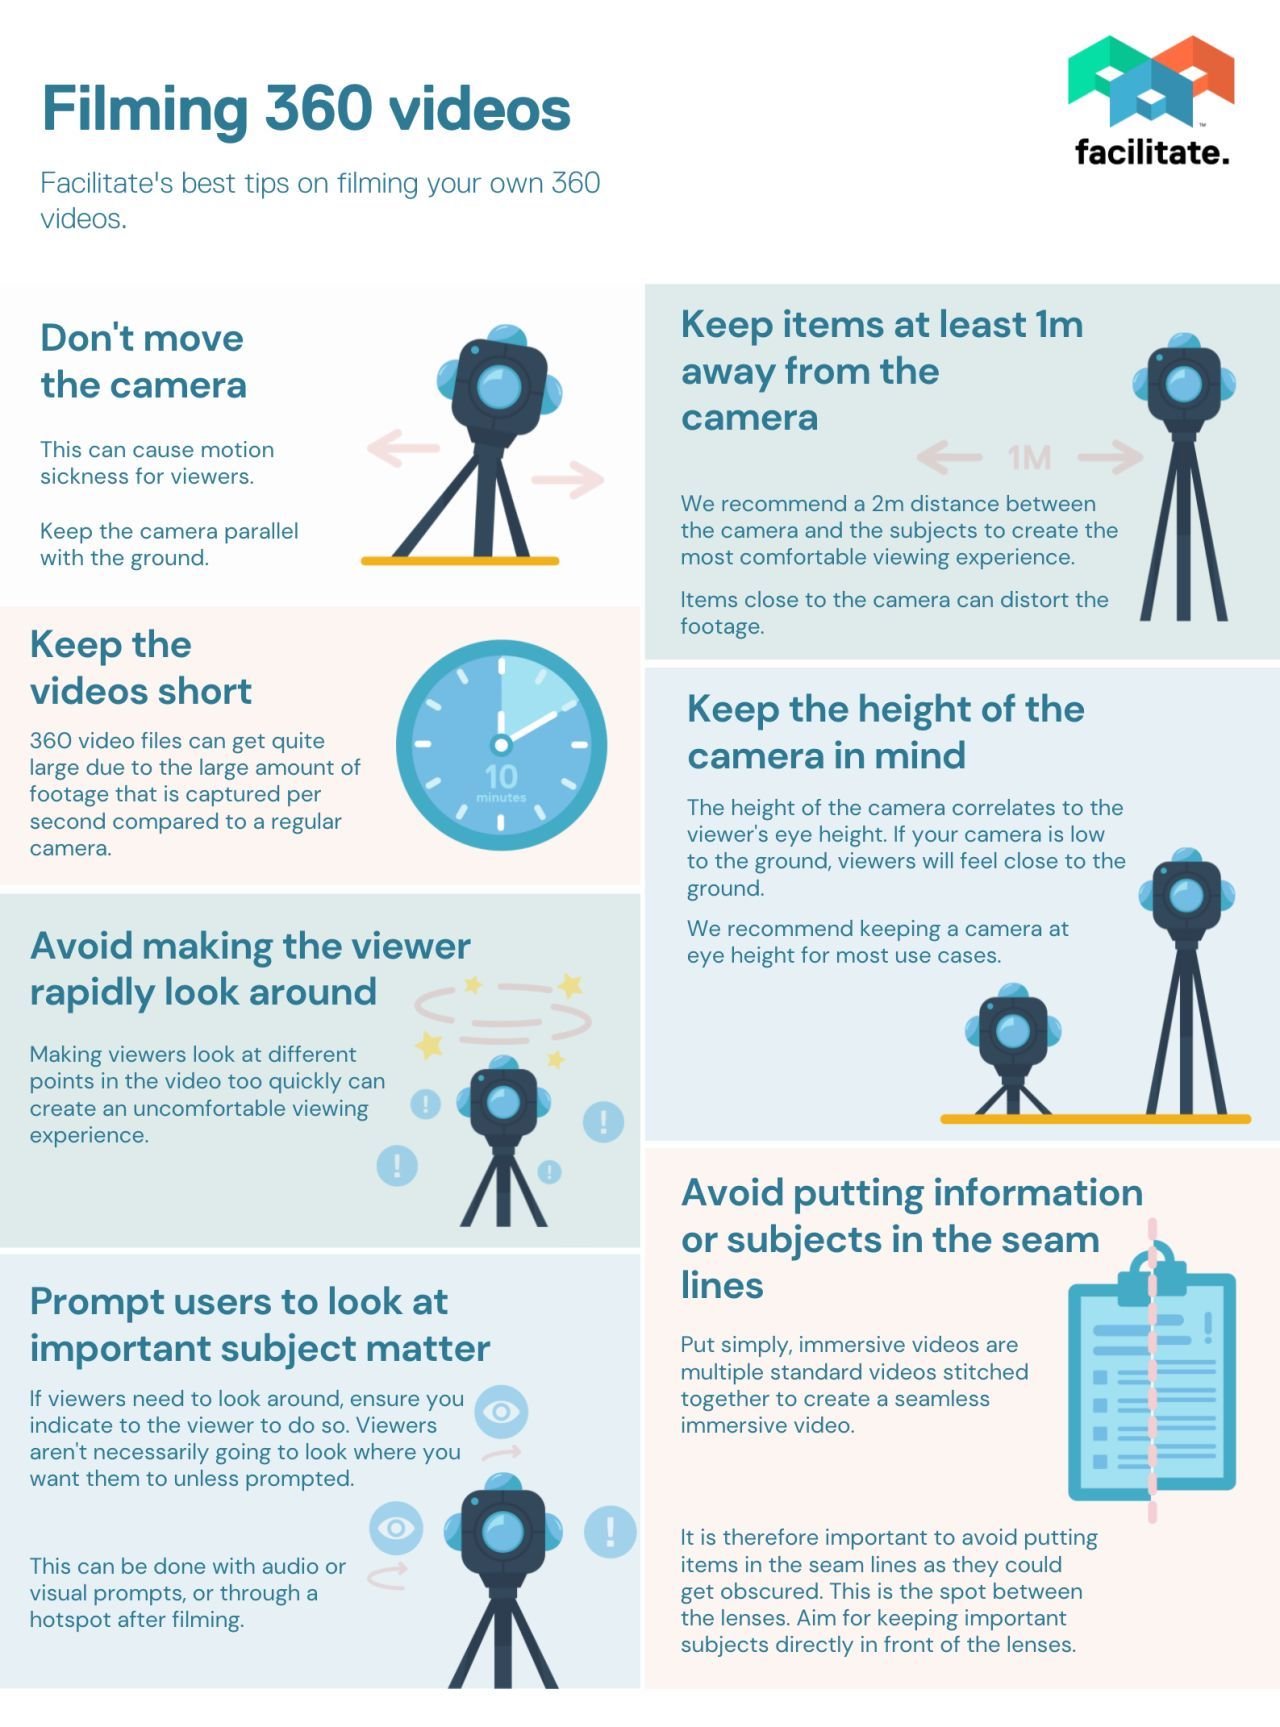
On-site Capture
This is straightforward and involves setting up a 360 camera (a good consumer grade camera will suffice) in the locations you wish to showcase. Typical examples include: the site entrance, main administration point, evacuation/muster points, first aid stations or other safety related locations.
It may also be beneficial to add locations specific to certain occupations operating on the site, for example, specific workshop, office, ward locations, storage locations for specific equipment or materials etc.
Professional videographers are not needed for this and by following some basic filming guidelines anyone can complete this filming.
Creating the Experience
Turning these images into a learning experience is easy in Facilitate, again, no specific skills are needed. The easiest way to do this is to base it on existing (or planned) in-person inductions. Adding the information which would normally be pointed out by a guide, in the form of interactive elements within the 360 images and videos.
To do this in Facilitate, simply upload the images and videos to Facilitate 360 Editor and connect them to each other to create a virtual tour using ‘way-points’. These way-points appear as arrows to a learner and allow them to navigate around the site.
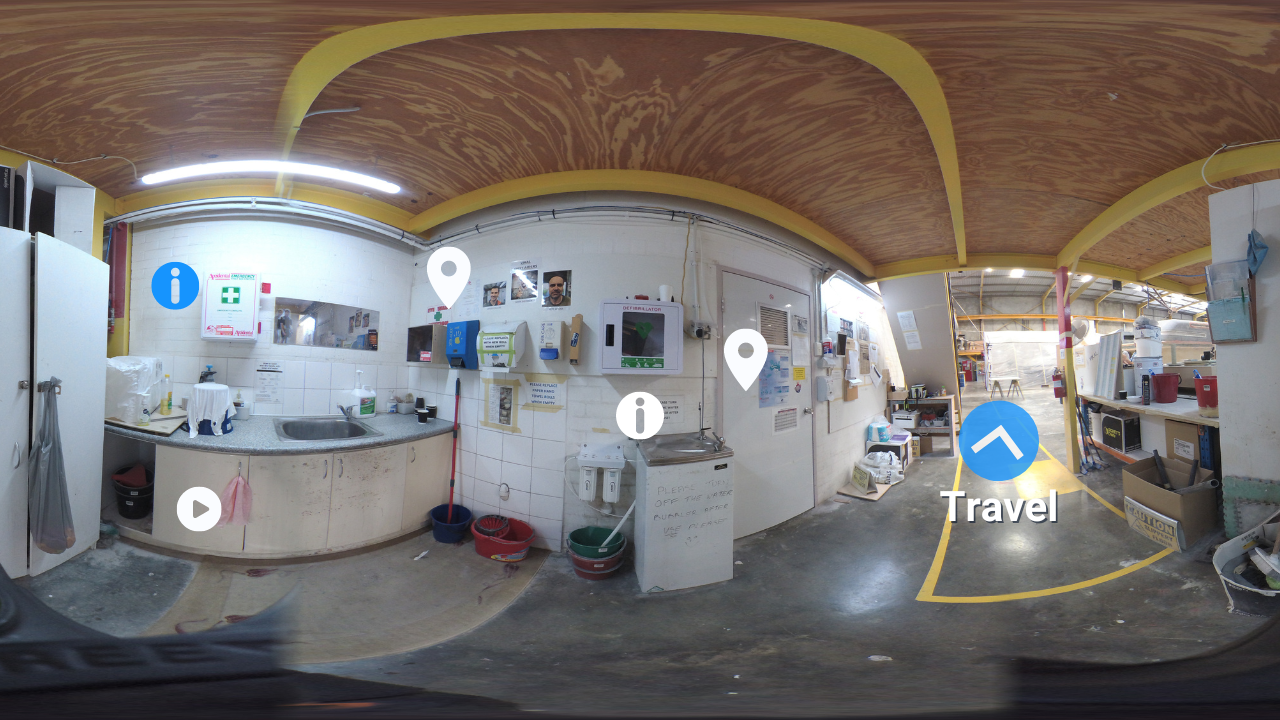
After this, add other interactive elements to each video or image. Suggested for a site induction are:
- Informational overlays above key buildings and parts of an image.
- Interactive hotspots (which a learner has to click to reveal) centred on key items in the scene which are important.
- Possibly embedding a 2D video showing any procedures or aspects which are to complex to explain via text.
- Add a number of confirmatory questions to assess understanding; this is best done in a final scene (a photo at the end of the tour).
Experience Dissemination
Distribution of the learning content to learners or new starters is straightforward, and depends on how VR is used within your organisation.
If a blended learning approach is to be used (where in-person facilitation is combined with VR) then the facilitator on the day can ‘schedule’ an experience for the day of the training and provide the VR headsets for student use. This is the most common distribution method and usually takes place in a metro office before new employees arrive at a site.
A variation of this approach is that the VR headsets are loaned to the new employees to complete the pre-loaded material in their own time before arriving on site.
Alternatively, a regional hub & spoke model is also possible whereby learners come into a central regional location to conduct training (this is used more commonly for on-going learning rather than first time inductions).
Lastly, there is also the option for learners to complete Facilitate experiences using their computer. Although not as immersive this provides an ideal alternative to using VR headsets.
Hopefully this outline has shown that it is possible for most industrial organisations to create their own VR site inductions using a 360 camera and the Facilitate platform.
At Facilitate, we'd be happy to talk you through the finer details and/or support you throughout the creation process if that's preferred. Reach out to us today to learn more.


Comments